


KubeBlocks 是一个开源的 Kubernetes Operator,适用于数据库和中间件,目前已支持的服务有如下:
- MySQL
- PostgreSQL
- Redis
- MongoDB
- Kafka
- RabbitMQ
- Minio
- Elasticsearch
- StarRocks
- Qdrant
- Milvus
- ZooKeeper
- etcd
随着上个月v1.0.0稳定版的发布,是时候值得我们体验一番了。本文以k8s 1.32版本为例,使用KubeBlocks进行在线部署mysql集群。
1.安装 Snapshot Controller
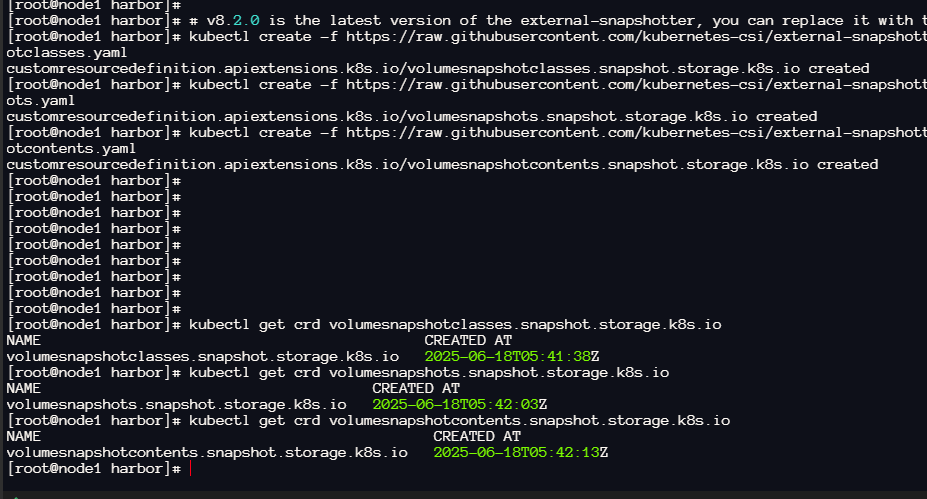
1.1 检查先决条件 验证是否存在所需的 CRD
kubectl get crd volumesnapshotclasses.snapshot.storage.k8s.io
kubectl get crd volumesnapshots.snapshot.storage.k8s.io
kubectl get crd volumesnapshotcontents.snapshot.storage.k8s.io

的集群缺少这些 CRD,则需要先安装它们:
# v8.2.0 is the latest version of the external-snapshotter, you can replace it with the version you need.
kubectl create -f https://raw.githubusercontent.com/kubernetes-csi/external-snapshotter/v8.2.0/client/config/crd/snapshot.storage.k8s.io_volumesnapshotclasses.yaml
kubectl create -f https://raw.githubusercontent.com/kubernetes-csi/external-snapshotter/v8.2.0/client/config/crd/snapshot.storage.k8s.io_volumesnapshots.yaml
kubectl create -f https://raw.githubusercontent.com/kubernetes-csi/external-snapshotter/v8.2.0/client/config/crd/snapshot.storage.k8s.io_volumesnapshotcontents.yaml
1.2 部署快照控制器
helm repo add piraeus-charts https://piraeus.io/helm-charts/
helm repo update
# Update the namespace to an appropriate value for your environment (e.g. kb-system)
helm install snapshot-controller piraeus-charts/snapshot-controller -n kb-system --create-namespace
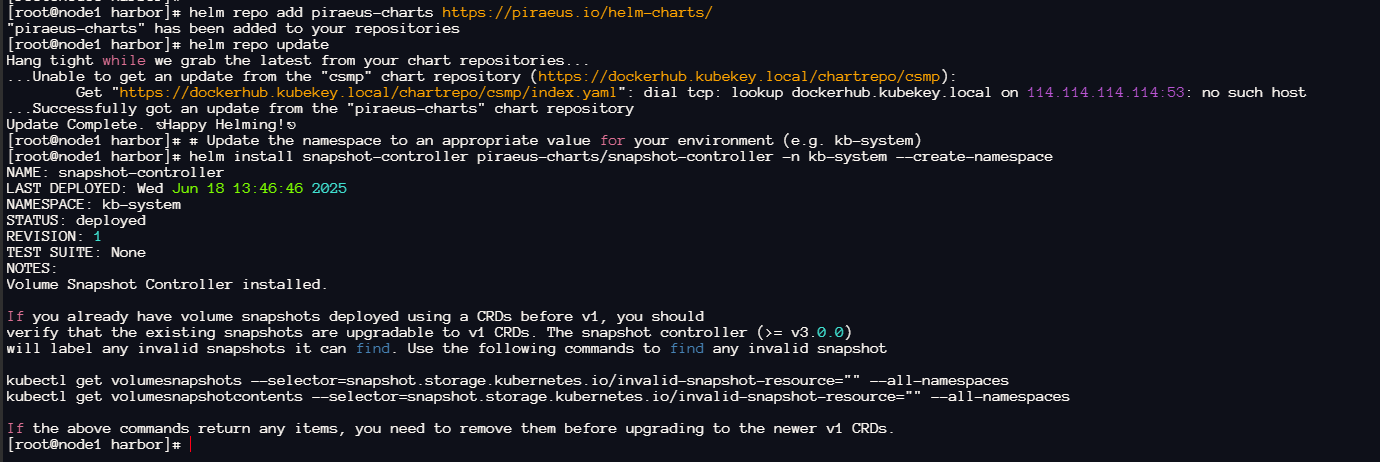
1.3 验证部署
kubectl get pods -n kb-system | grep snapshot-controller
需要导入镜像
docker pull registry.k8s.io/sig-storage/snapshot-controller:v8.2.1

2.安装 KubeBlocks
使用helm安装
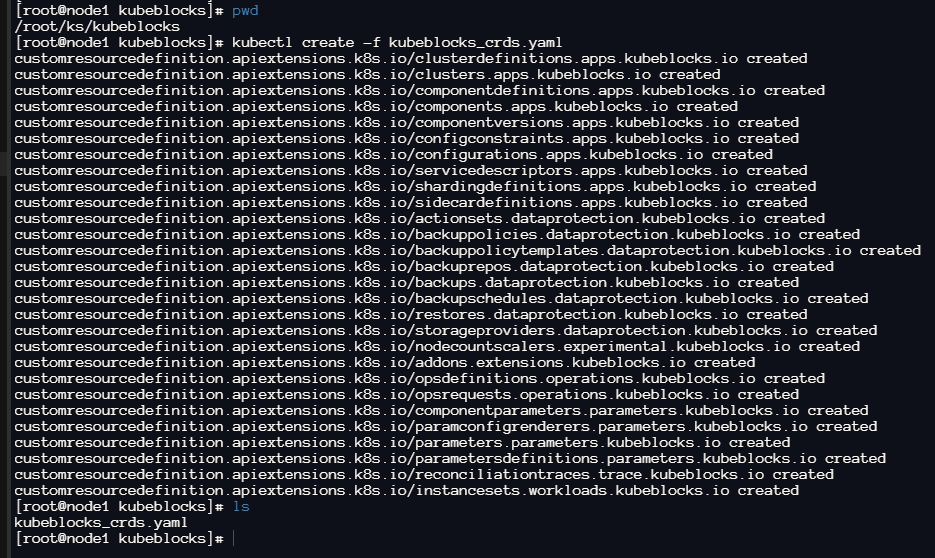
2.1 安装crds
kubectl create -f https://github.com/apecloud/kubeblocks/releases/download/v1.0.0/kubeblocks_crds.yaml
若网络限制,可去github手动下载该yaml后上传至服务器。
kubectl create -f kubeblocks_crds.yaml
2.2 配置helm仓库
helm repo add kubeblocks https://apecloud.github.io/helm-charts
helm repo update
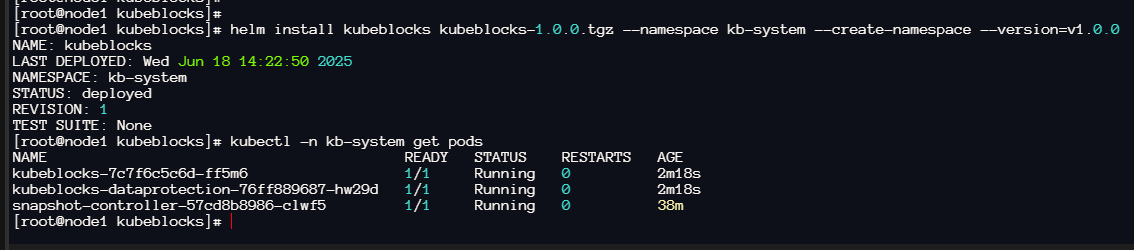
2.3 安装KubeBlocks
helm install kubeblocks kubeblocks/kubeblocks --namespace kb-system --create-namespace --version=v1.0.0
需要网络原因,可先下载helm离线包
VERSION=1.0.0    # Chart 版本
helm fetch kubeblocks/kubeblocks --version=${VERSION}
上传离线helm后安装
helm install kubeblocks kubeblocks-1.0.0.tgz --namespace kb-system --create-namespace --version=v1.0.0
2.4 验证
默认使用了阿里云镜像
用到的镜像
apecloud-registry.cn-zhangjiakou.cr.aliyuncs.com/apecloud/kubeblocks-charts:1.0.0
apecloud-registry.cn-zhangjiakou.cr.aliyuncs.com/apecloud/kubeblocks-tools:1.0.0
apecloud-registry.cn-zhangjiakou.cr.aliyuncs.com/apecloud/kubeblocks:1.0.0
apecloud-registry.cn-zhangjiakou.cr.aliyuncs.com/apecloud/kubeblocks-dataprotection:1.0.0
安装时使用自定义仓库
以下未验证,猜测是
helm install kubeblocks kubeblocks/kubeblocks --namespace kb-system --create-namespace \
--version v1.0.0 \
--set image.registry=apecloud-registry.cn-zhangjiakou.cr.aliyuncs.com \
--set dataProtection.image.registry=apecloud-registry.cn-zhangjiakou.cr.aliyuncs.com \
--set addonChartsImage.registry=apecloud-registry.cn-zhangjiakou.cr.aliyuncs.com
查看已安装的插件

3.安装mysql
https://kubeblocks.io/docs/preview/kubeblocks-for-mysql/02-quickstart
3.1 创建 MySQL 集群
#直接安装的mysql为8.0.35
kubectl apply -f https://raw.githubusercontent.com/apecloud/kubeblocks-addons/refs/heads/main/examples/mysql/cluster.yaml
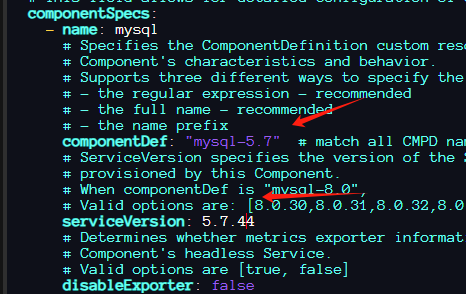
若需要安装mysql:5.7.44版本,修改以下文件
https://raw.githubusercontent.com/apecloud/kubeblocks-addons/refs/heads/main/examples/mysql/cluster.yaml

vim cluster.yaml
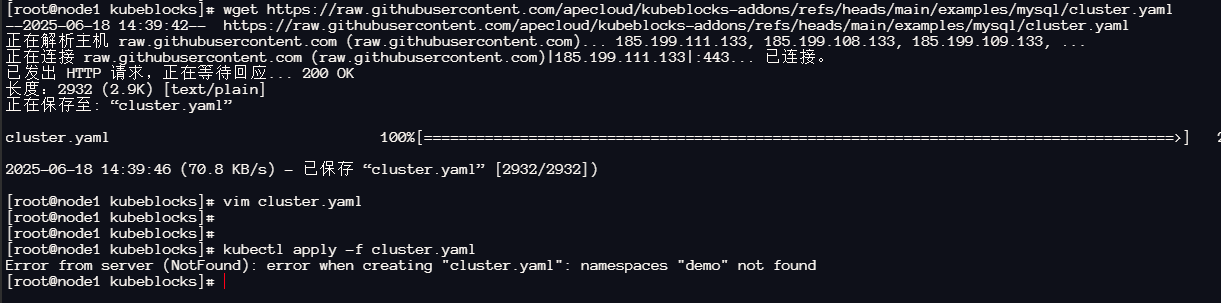
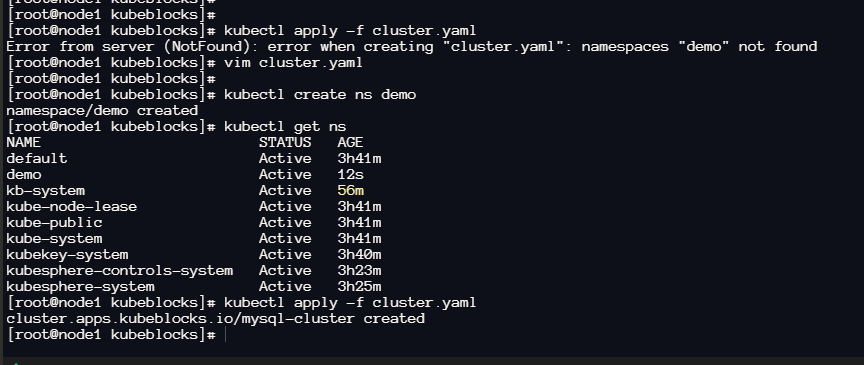
由于使用了demo命名空间,demo不存在导致报错,需要先创建ns-demo,然后再kubectl apply -f cluster.yaml
kubectl create ns demo
用到的镜像,需要有个存储类
apecloud/mysql:5.7.44
apecloud/mysqld-exporter:0.15.1
apecloud/xtrabackup:2.4
apecloud/jemalloc:5.3.0
apecloud/mysql_audit_log:5.7.44
apecloud/syncer:0.5.0
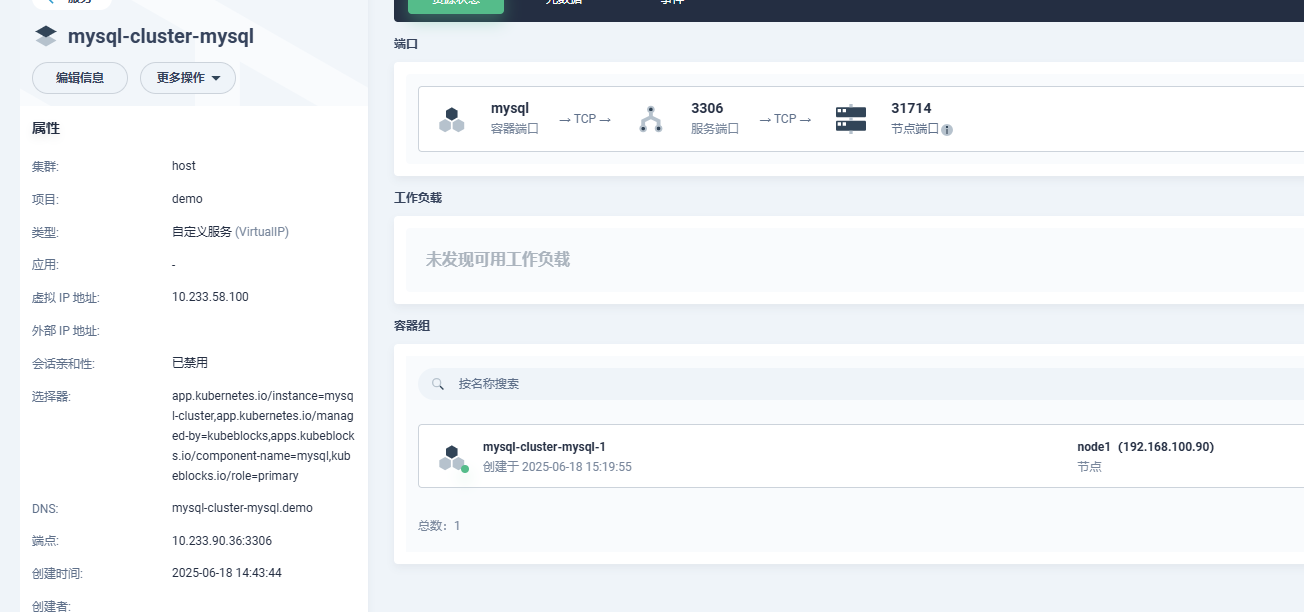
3.2 访问
服务-mysql-cluster-mysql,开启nodePort
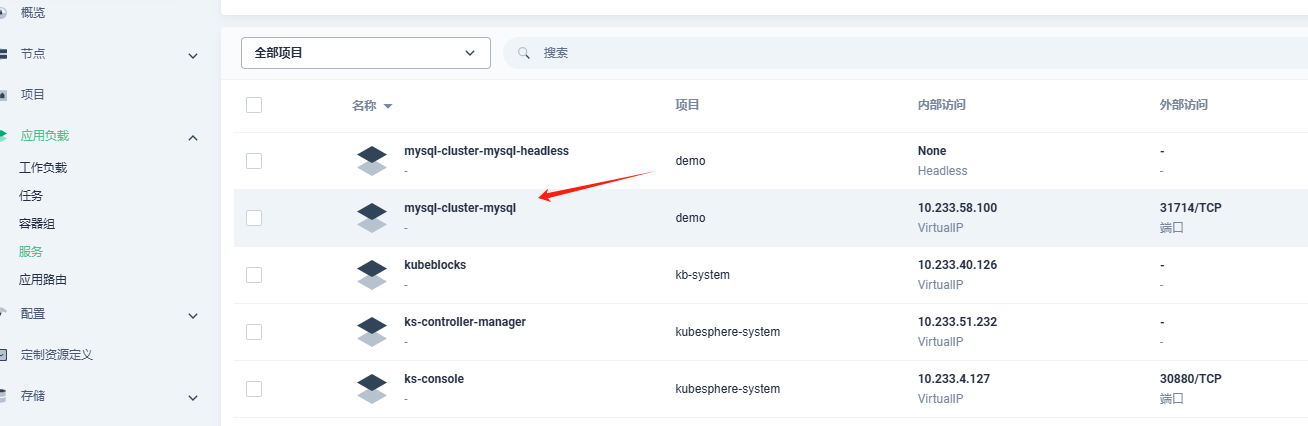
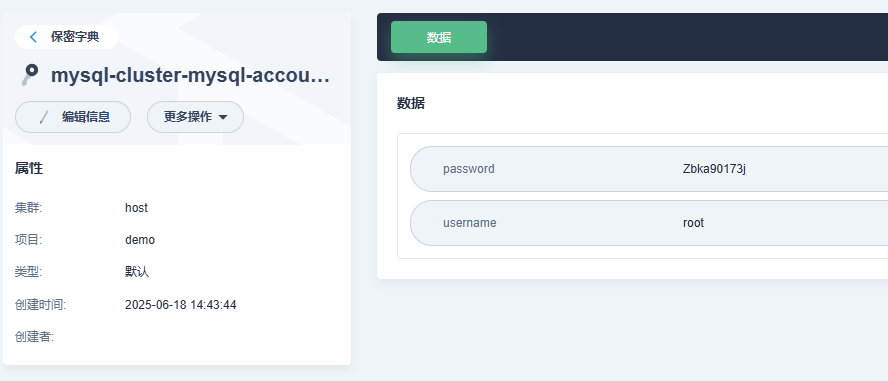
密码在保密字典-mysql-cluster-mysql-account-root
验证
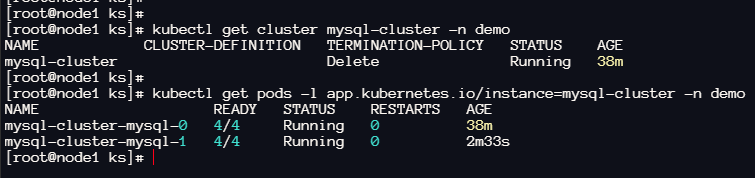
默认部署了两个mysql 容器组

我们将mysql-cluster-mysql-0对应容器停止,可以看到mysql-cluster-mysql服务秒级切换到了mysql-1
通过Navicat等工具,测试数据同步和连接,表现依然亮眼,全部秒级切换完成。


评论区